Hardware
Setting up a new client computer
You should use debian testing for new machines due to it’s better compatibily with modern hardware.
Get a working Linux client and downlaod the Debian testing iso. Then transfer the image via the dd command to the USB-stick. Determine the disk number of the USB-stick via the lsblk.
dd if=/home/username/downloads/debian.iso of=/dev/disk2
When dd is finished unplug the USB-drive and stick it into the new computer. Depending on the vendor you have to press a different F-key while booting the new machine (usually F12 or F2). Then you should get into the boot-menu from the computer and choose the USB-stick.
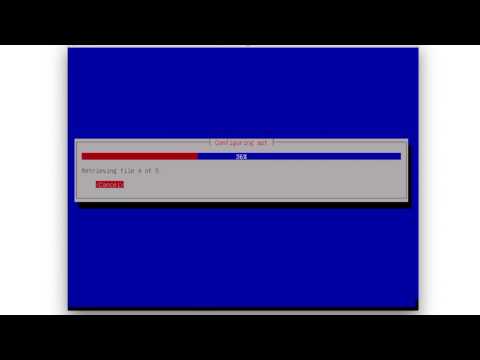
The Debian-installer should show up now. Choose the non-graphical installer.
And follow this video how to install the operating system correctly.
Svalbard
Svalbards chassis-manual can be found here. It's crucial to have a look at it, if you want to install new harddrives.
- Intel Xeon E5-2623 v3
- Supermicro X10SRL-F retail
- Supermicro SuperChassis CSE-836TQ-R500B Black
- Noctua NH-D9DX i4 3U
- 4x Kingston ValueRAM DIMM 4 GB DDR4-2133 Registered - KVR21R15S8/4
- 2x 250 GB Samsung EVO 850 V1
- 6x Western Digital WD Red Pro 6 TB - WD6001FFWX
Harriet (Dell PowerEdge R820)
- 4x Intel Xeon E5-4617
- 2,5" Chassis with up to 16 Hard Drives
- 32x 16 GB RDIMM, 1600 MHz, Low Volt, Dual Rank, x4
- 2x 146 GB SAS 6Gbit/s 15k 2,5Zoll Festplatte Hot Plug
- 4x 1,2 TB SAS 6Gbit/s 10k 2,5Zoll Festplatte Hot-Plug
- QLogic QLE2562, Dual Port 8Gb Optical Fibre Channel HBA, Low Profile
- Broadcom 5720 QP 1Gb Network Daughter Card
- LSI Logic LSI00301 Host Bus Adapter (removed original Dell PERC H710p)
- iDRAC7 Enterprise
Beagle
- 2x Xeon E5450
- 8x 4 GB buffered DDR 2 PC-667
- Chieftec Mesh schwarz LCX-01B-B-SL-OP
- PCIe 4N GF8400GS 256MB MSI
- Supermicro X7DAE
- 3x 2 TB 3,5"
Monitoring and maintaining the hardware
First of all you should take a look onto the monthly maintenance reports from our bots in Slack. They will post a hardware-log and a short message if everything seems right or wrong.
How to interpret the log from the Slack bot
The logfile contains 2 crucial types of information:
- the SMART status of all mass storage devices (interpretation help)
- the result of the btrfs scrubbing (
scrub manpage)
All you have to know about the SMART-status is, that it gives you a general overview of the disks health. How many hours is it spinning, how oftern turned it of and on, how many recoverable errors is it producing. As long as the “SMART Health Status” is said to be “OK” you don’t have to worry about it. If an harddisk does not pass the SMART test all the work on the affected server should be immideatly stopped. Continue with the appropriate section in the FAQ. LINK TO FAQ
The scrubbing of btrfs verifies the integrity of the filesystem. If the filesystem counted errors you are will likely loose data in the next moments. Errors here are mostly produced by the RAM or the harddisks. As long btrfs is scrubbing with “0 errors” you have nothing to worry about.
CPU and RAM usage
Install and run the utility htop: aptitude install htop.
Harddisks / Storage
To start a SMART-selftest of the drive sda (type lsblk to get a list of all drives and their identifiers) type:
smartctl -t short /dev/sda`
To see the results of the test (the test will take ~3 minutes)
smartctl -a /dev/sda
Temperatures
To monitor the temperature it is best and fastest to use the programm sensors. You install it via aptitude install sensors. Then you have to detect all thermal sensors installed into the system: sensors detect --auto
For the temperatures of the harddrives you need to use root and some code like this:
while true do sleep 2 for f in a b c d g h do echo “$f” smartctl -x “/dev/sd$f”|grep Temperature done echo "" done
Remotely connect via iDRAC (Harriet) and IPMI (Svalbard)
iDRAC
With the integrated Dell Remote Access Controller you can manage the server remotely. It’s basically a tiny computer inside of the server.
The recent IP to connect to harriets DRAC you can find in the IP-routing table. You have to enter the IP into a browser and then you will be prompted with an username and password. Both can be found in the groups keepass-database. With the help of the DRAC and a java console you are able to mount .iso files into the system and install new operating systems remotely.
To use the java-console, you need to start a specific preconfigured vm and connect to it, or you install java on your local computer and add a security-exception for the DRACs IP (https://141...).
IPMI
Since Svalbard is not a Dell server he doesn’t have a DRAC. Instead he’s having a standard IPMI controller on the mainboard to control the server hardware remotely. The IP is also available in the table mentioned above. You can simply reach it with every standard webbrowser. A console is not available, since it would had required additional KVM hardware (as far as I know).